Running the test
Once we've made all the
required settings and finished recording all the required requests,
running the test is very easy. Before running, we can also define the
context parameters, extraction, and validation rules, add the data
sources, and bind the Form Post or Query String Parameters. But once we
run the test we should take care of verifying all the results that we
receive out of this test run. Use the Run Test option in the Web test editor toolbar to start running the test.
Now you can
notice the test execution and the progress of each request in the web
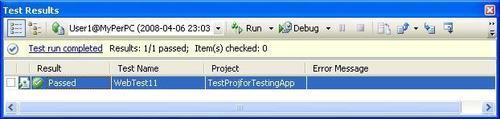
test window. After completing the execution, the result window displays
success and failure information and marking against each request. If any
one of the requests in the test fails, the entire test is marked as
failed. The test result window shows the end result of the testing.
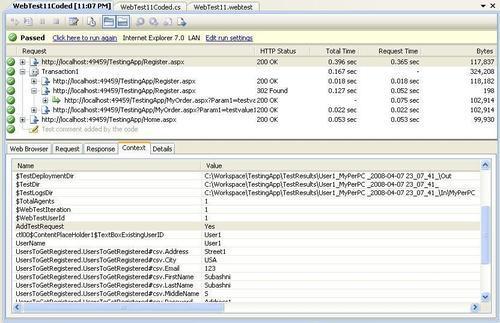
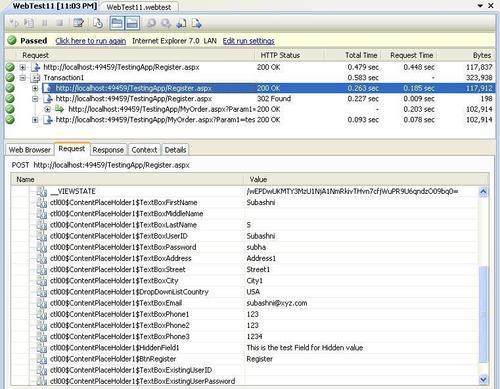
If there are multiple
requests in the test, the test result details window shows the result
for each request. It shows the status of the request, as well as the
details of the request, response, context, and the details of
information gathered during the testing. These details are shown as a
tabbed page with details as given below:
Web browser
This is the same web page used by the request. This tab displays the entire web page used just to get the view of the request.
Request
The Request
tab contains all the information about the request like Headers,
Cookies, Query String Parameters, Form Post Parameters. You can notice
the Form Post Parameters with the values assigned to it and sent it with
the request.
Response
This tab section shows
the response for the requested web page. The result is shown as a plain
HTML text with headers and body of the web response. There is also an
option to view the response in an HTML editor.
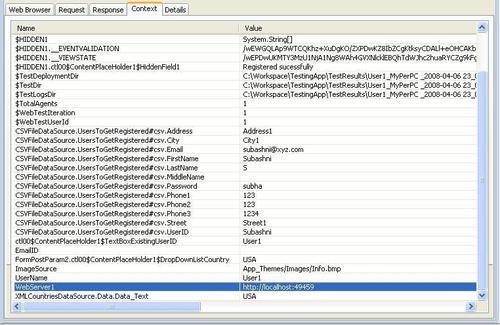
Context
This section is very
important to note as we have all the run-time details assigned to the
test been captured here. Remember the data source we added in the Add Data Source
section and binding the Form Post Parameters to the data source fields.
We added the CSV file and bound the parameters. All the values picked
from the data source and assigning the values to the parameters are
shown here. Also the context parameters that we created before testing
and the values assigned to the parameters during the run-time are also
shown here. This is the place to verify visually all the values that are
assigned to the context parameters and form fields.
Details
The Details
tab shows the status of the rules that were executed during the test.
We can see from the below image that all the rules created as explained
in the rules section got executed successfully. The details section also
shows the type of the rule and the parameter values fetched during the
execution of the rule. Looking at this details tab we can verify the
parameters values returned by rules visually.
Below the toolbar in the web
test window we can see the option for running the test again. This is
useful to rerun the same test again and find the results, if there are
any changes, to the source data or the configurations. There is another
option to edit run settings. This option opens the same Web Test Run Settings window used by the configuration settings. This is another shortcut to change the web test settings.